
Event badge printing is supported by event management platforms that link registration data to an onsite printer so a badge prints at check-in. When comparing platforms, check for a badge designer tied to ticket types, a published printer compatibility list, self-service kiosk printing, and reprint controls. Accelevents covers all four in one platform.
Event name badges are more than identifiers. They are how attendees find each other, how exhibitors capture leads, and how your team controls access. This guide covers how badge printing works, what to look for in a platform, which printers are supported, and how to run check-in on event day. For the wider operational picture, start with the event check-in and badging playbook.
We use Accelevents as the worked example, but the criteria below apply to setting up badge printing on any platform.

What platforms support badge printing for event attendees?
Most event management platforms fall into one of three groups. Some print badges natively from registration data. Some rely on a separate onsite module or vendor that is quoted and billed apart from the core platform. Some do not print badges at all and expect you to export an attendee list to a badge bureau or a desktop label tool.
Use these seven criteria to tell them apart:
- Badge designer tied to ticket types. Can one base design vary by ticket type without maintaining separate files for attendees, speakers, exhibitors, and staff?
- A published printer compatibility list. Named, tested models beat "works with most printers."
- Printing device support. Confirm whether printing runs from a tablet, a laptop, or a phone, and which one the vendor actually recommends.
- Self-service kiosk printing. Can an attendee scan or search, confirm their details, and take the badge without a staffed desk?
- Walk-in handling. Can someone who never registered complete registration and get a badge at the same station?
- Reprint permissions and print counts. Who is allowed to reprint, and can you see how many badges were printed and on which device?
- Documented network requirements. A vendor that publishes bandwidth guidance has been onsite enough to know it matters.
Two things are worth verifying with any vendor before you sign, because they are the most common late surprises: whether onsite badge printing is priced inside the platform or quoted as a separate module, and whether the printing workflow requires a vendor-supplied onsite project manager. Teams moving off larger enterprise platforms raise both consistently, along with fragmented setups where the attendee list, the badge file, and the print vendor live in three different systems. If you are still shortlisting, our roundup of check-in apps and their onsite features covers how the main options differ.
How Accelevents handles each criterion
Accelevents prints badges natively from registration data inside the same platform that runs event check-in, so there is no export step and no second vendor in the loop.
- Design. Build a badge from a template or from scratch in the Badge Designer under Registration > Badges, then associate it with one or more ticket types. Custom dimensions are supported up to 15 inches in each direction.
- Variable content. Widgets pull any active buyer or holder field from the order form, including custom fields. Text, labels, colors, and images can show, hide, or change based on what an attendee answered during registration, and add-on purchases can be printed on the badge.
- Printers. Direct thermal Zebra "ZD" models are the primary supported path. Color printers connect through PrintNode. Full list in the table below.
- Kiosk. An iPad running the Admin App in kiosk mode lets attendees scan a Quick Response (QR) code or search by name, email, ticket number, or phone number, confirm and optionally edit the fields that will print, then print their own badge.
- Walk-ins. Turn on registration in the kiosk settings and an unregistered arrival can select a free or paid ticket at the kiosk and print a badge in the same visit.
- Reprints. Reprinting is a setting. Event Admins and Admins can always reprint. Attendees and Staff-role team members can reprint only when the kiosk reprint toggle is on.
- Reporting. Registration > Badges shows a total badge print count broken down by printing location and device, and the Ticket Holder report includes a Badge Printed column.
For the full setup walkthrough, see badge printing software.
How can I create custom badge designs for events?
Custom badge design comes down to two things: a branded layout that reads well at arm's length, and variable attendee fields that are easy to scan onsite. Start by deciding how the badge will be worn, whether that is a lanyard, a clip, or a holder. Then choose a size and layout where the attendee name is the most readable element. Add your logo and event colors, then place fields like company, job title, and a QR code for check-in, lead capture, or networking. Build from a badge template or from scratch, then run a test print on real stock before event day.
Choose your approach based on what you need
- If you need speed and consistency, start from a template so every badge type follows the same layout.
- If you need strict brand control, build from scratch so size, spacing, and hierarchy match your brand rules.
- If scanning is part of your onsite workflow, prioritise the QR code so badges support check-in, lead capture, session tracking, and networking.
Quick checklist for a professional custom badge
- Make the attendee name the largest, most readable element.
- Add organization and title to support networking.
- Add event branding, meaning logo and theme colors.
- Include a QR code if you plan to scan anything.
- Test print on your real badge stock so spacing and readability are correct.
The Four Advantages Of Integrated Badge Management Systems
Running badge management, registration, and check-in on one platform changes four things.
- Efficiency. One system means one attendee record, so check-in and printing happen in a single action instead of a lookup followed by a separate print job.
- Data integrity. Names, titles, and company names print from what the attendee entered at registration. There is no export, no intermediate spreadsheet, and no version drift between the list and the badge.
- Cost and time savings. One platform to license, one workflow to train staff on, and no handoff between a registration vendor and a badge vendor.
- A better attendee experience. Because the badge generates at check-in, a correction made that morning prints correctly. A well-designed badge then does real work on the floor, giving people a reason to start a conversation.

Badge Management 101 with Accelevents
Here is the process end to end, from design through printing on event day, using our event management software as the worked example.
Step 1: Design Badges Like a Pro
Information To Include On Your Badge
Go to Registration > Badges, pick a template or a custom badge, name it, associate it with the relevant ticket types, and click Create.
Include at minimum:
- Attendee name. The largest element on the badge. Test how a long name behaves, since truncation and unexpected line breaks are the most common badge print problem.
- Job title and organization. These are what make the badge useful for networking.
- Event branding. Logo and theme colors, sized so they do not compete with the name.
- QR code. Required if you plan to scan for session check-in, lead capture, gamification, or attendee-to-attendee networking.
You can also add fields like registration type, access level, or social handle. Widgets pull from any active buyer or holder field in your order form, including custom fields, so enable the fields you want printed before you start designing.
Elements can also be conditional. Labels, colors, and images can change based on registration answers, which means one base layout can serve VIP, speaker, exhibitor, staff, and press without maintaining five separate designs.
The Importance Of A Clean and Professional Design
Start with how the badge attaches. A branded lanyard reads differently from a clip-on plastic card, and the choice drives size, orientation, and whether you go single or double sided. Settle that before you design anything.
Then decide on size, single or double sided, and corner style. Only after that move to aesthetics: full color versus monochrome, and how tightly the design tracks your event theme.
On type, pick a font with open letterforms and enough weight to hold up at small sizes on thermal stock. Set the name in the heaviest available weight and check it against your longest registered name. For more on layout, see our five badge design rules, and for materials and holders, see our guide to event badges.
Why You Should Display A QR Code On Your Badge
A QR code turns the badge from an identifier into an input device.
- Attendee networking. Attendees scan each other's codes to connect, and those contacts persist across future events under the People tab in the app.
- Gamification. Attendees earn points when exhibitors scan their badge to capture them as a lead.
- Session check-in. Attendees scan themselves in to sessions instead of queuing at a door with a clipboard.
- Exhibitor lead capture. One scan pulls the attendee's details into the exhibitor's lead list, including their registration answers.

Step 2: Preparing For The Printing Process
Essential Equipment For Printing Professional-Grade Badges
Accelevents is designed to print a single badge per page. Zebra "ZD" series direct thermal printers are the primary tested path.
Any printer PrintNode supports may also work. Check the PrintNode compatibility list, then test with your real badge stock before event day. Zebra thermal printers also handle wristband-size media. Accelevents does not supply printers directly, so plan to rent or buy. If you are choosing hardware from scratch, work through how to choose an event badge printer first.
On stock: thermal paper is built for these printers and gives the sharpest result. Choose something durable but light. Lamination adds sturdiness for multi-day events or badges intended as keepsakes.
What network do you need for onsite printing?
Printing pulls the badge from Accelevents at check-in, so each printing device needs its own working bandwidth. Plan for at least 10 Mbps download and 5 Mbps upload per device. Five kiosks means roughly 50 Mbps down and 25 Mbps up available in total.
Wired ethernet to the printer is preferred over Wi-Fi for stability, and the printer has to sit on the same network as the iPad driving it. If you are on Wi-Fi, keep the check-in network off the same bandwidth as livestreams or exhibitor traffic, and confirm signal strength at each kiosk position rather than at the router.
How To Prepare Your Designs for Print
Resolution. Use the darkest print setting and the highest dots per inch (DPI) your printer allows. Note that downloaded badge files are around 150 DPI, so a highly detailed logo may look soft. Simplify fine artwork rather than relying on the printer to resolve it.
Padding. Leave roughly 1/8 inch, or 3mm, of buffer around the design so nothing is clipped when the badge is printed and cut.
Proofing. Before a full run, check that font sizes are legible with no typographical errors, that margins and alignment are consistent across every badge type, and that logos are positioned without crowding the name. Then print on the material you will actually use. Screen previews will not surface spacing and contrast problems that the stock will.
Event Badge Printing: When Is The Right Time to Hit 'Print'?
Option 1: Pre-event printing. Works when registration numbers are stable and last-minute changes are rare. Badges are printed, sorted, and boxed in advance, which simplifies onsite setup. The tradeoff is that any change after printing means a reprint, and unclaimed badges are wasted stock.
Option 2: Onsite printing. Badges generate at check-in from live registration data.
- Measured print times. On a Zebra direct thermal printer, a badge finishes in about 7 seconds. Color printers connected through PrintNode take 20 seconds or more depending on the model and how much of the badge is printed art. At 7 seconds per badge, one station clears roughly 8 badges a minute before staff handling time.
- Edit and reprint onsite. Correct the attendee record and reprint. No exports, no separate file.
- Walk-ins. Someone who never registered can register and print at the same station.
- Less waste. You print what you actually need rather than a full pre-printed set.
- Plan for the network. Badge printing needs a live connection. If the venue network drops, the mobile Admin App keeps checking attendees in to the event and to sessions, and syncs those check-ins automatically within about five minutes of reconnecting. Badges will not print during that window, so keep a wired connection to the printer and a staffed fallback lane.
If you want color without the 20-second wait, pre-print the color design onto the badge stock and print only the attendee information at check-in.
One caveat that applies either way: onsite printing still depends on working printers and a staffed desk. Without both, attendees will queue regardless of how fast the software is.

Step 3: Printing Badges On Event Day
Badge printing runs alongside registration and check-in, so there are two paths.
Assisted check-in. Staff search or scan on the Admin App, confirm the attendee record, and print. Because the badge generates at check-in, a name corrected that morning prints correctly. You can also restrict which ticket types are allowed to check in at a given station, so a speaker desk and a general attendee desk run different rules from the same event.
Self-check-in at a kiosk. Switch an iPad running the Admin App into kiosk mode and attendees handle it themselves. They scan the QR code from their confirmation email or search by name, email, ticket number, or phone number. An optional confirm step shows the fields that will print and can let the attendee correct them before printing, which is the practical fix for misspelled names at scale. Groups arriving on one order can check in and print every badge in a single action. Add a four-digit kiosk personal identification number (PIN) so staff can exit kiosk mode without full login credentials.
For a multi-day event, enable check-in re-entry so a badge can be scanned each day, with every scan recorded in analytics. If you are also mapping the floor around your check-in stations, our floor plan software roundup covers the layout side.
Radio frequency identification (RFID) badge stock can also be programmed at check-in and then scanned for venue entry and exit, session check-in, exhibitor lead capture, and attendee networking.
What Accelevents badge printing does not do
Worth knowing before you plan your workflow:
- Badges print one per page. Multi-up label sheets are not supported, so a dedicated label tool is needed for that format.
- Badge printing is not available on the Starter Plan.
- There is no single bulk-print button. Badges can be downloaded in bulk from Attendees > Check In Attendees.
- Badges cannot print while the app is in offline mode. Check-in continues, printing does not.
- Printing from a phone works but enlarges the design, so an iPad is the recommended device.
- The Badge Designer handles straightforward layouts. For complex artwork, build the graphic elsewhere and upload it as an image.
Key Takeaways
- Integrate check-in and badge management. One attendee record means the badge is always current and there is no export step to get wrong.
- Design for the stock, not the screen. Name first, adequate weight and contrast, and a test print on real material before event day.
- Match the printing method to your registration pattern. Stable numbers favour pre-printing. Late registrations and walk-ins favour onsite.
- Plan the network as carefully as the design. Wired connections, per-device bandwidth, and a staffed fallback lane.
If you want to talk through your specific setup, our support team responds in less than 21 seconds, 24/7, and can confirm printer compatibility before you buy. You can also request a demo to explore how Accelevents can simplify your event management process.
Don't Want to Buy? Rent Everything You Need With the Accelevents Onsite Kit
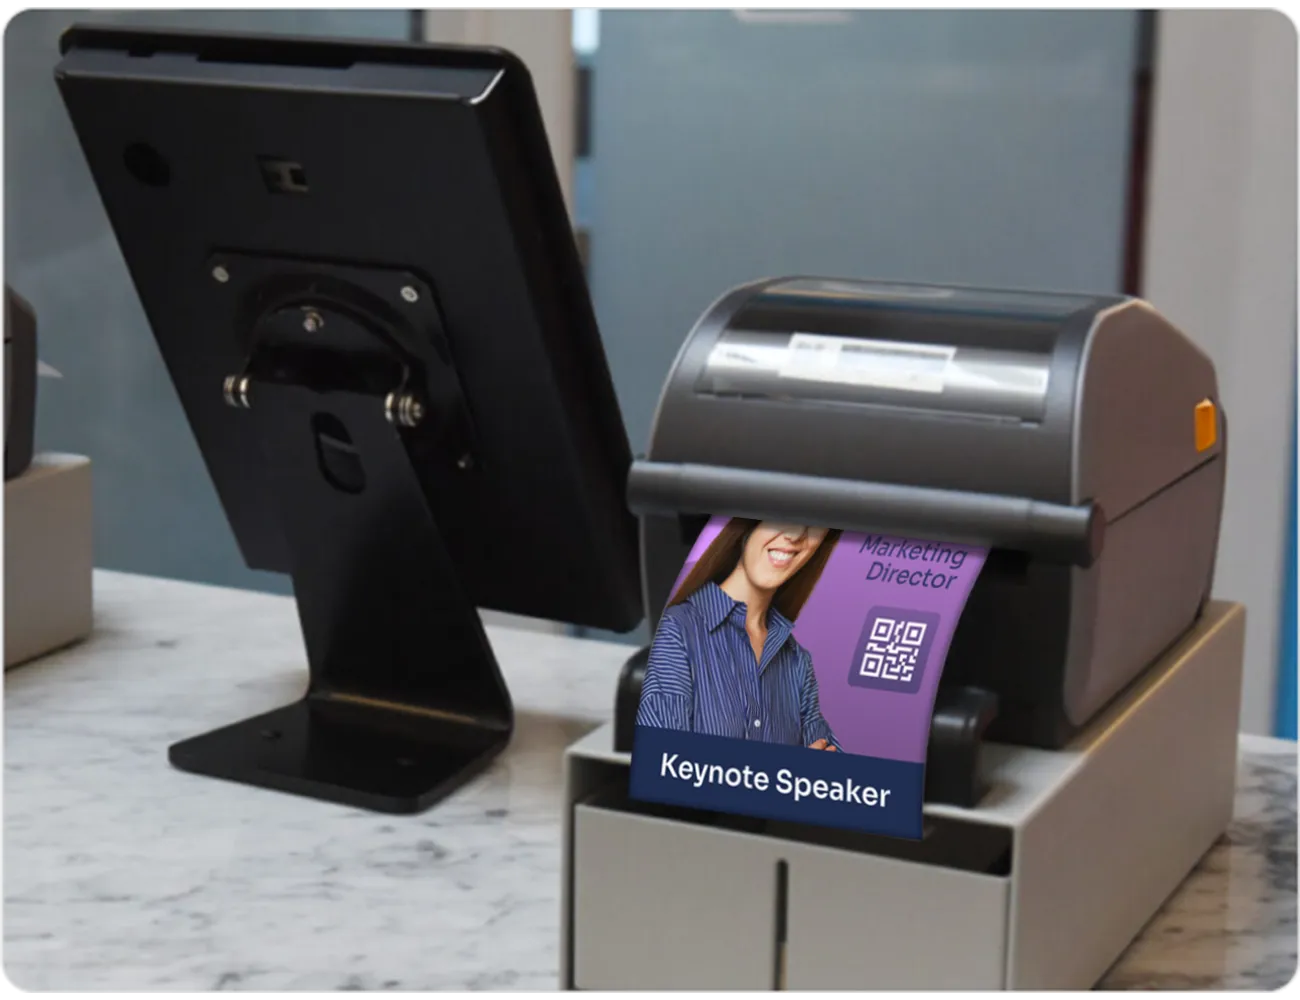
If you are not ready to invest in your own badge printers, the Accelevents Onsite Kit ships everything you need for check-in and badge printing directly to your event.
It suits events of up to 1,000 attendees and includes:
- Zebra printers, pre-configured
- iPads with Accelevents software installed
- Direct thermal badge stock
- Cellular router with data
- Lanyards, stands, and more
Choose Standard or Large depending on your crowd. If you are running check-in without badge printing, there is a Kiosk Kit as well.
Every kit includes a setup call plus one hour of remote support. You can add onsite support and we will handle setup, troubleshooting, and tear-down.
Learn more about the Accelevents Onsite Kit
Frequently asked questions
How do I create different badge designs for different attendee types?
Build one base badge in the Badge Designer, then associate it with specific ticket types. For variations, use conditional widgets so labels, colors, and images change based on registration answers rather than maintaining separate designs. A speaker, an exhibitor, and a general attendee can share one layout with different colors and role labels.
Can I reprint a badge onsite if the information is wrong?
Yes. Event Admins and Admins can reprint at any time. Attendees and Staff-role team members can reprint when the kiosk reprint setting is enabled. Because badges generate from live registration data, correcting the attendee record first means the reprint carries the fix. Registration > Badges shows total print counts by device.
What printer do I need for event badge printing?
Zebra "ZD" series direct thermal printers are the tested primary option, including the ZD420, ZD500, ZD620, and ZD621, printing in about 7 seconds per badge. For color, the Zebra ZC10L, Epson C3500 and C4000, and Evolis Primacy CR80 connect through PrintNode on a Windows laptop. Printing from an iPad is recommended over a phone.
Can attendees check in and print their own badges at a large conference?
Yes. An iPad in kiosk mode lets attendees scan their QR code or search by name, email, ticket number, or phone number, confirm what will print, and take the badge. Walk-ins can register at the kiosk and print in the same visit. Run several kiosks in parallel and give each one its own bandwidth.
How do I avoid badges that look good on screen but print poorly?
Always test print on the actual badge stock, then adjust font size, contrast, spacing, and truncation for long names. Downloaded badge files are around 150 DPI, so simplify fine detail in logos rather than relying on the printer to resolve it.
Event name badges are more than just identifiers. They are a visual representation of your event and the organization behind it.
Expertly designed and printed name badges reinforce your event’s branding and signal professionalism. When the badge looks polished, it sets the expectation that the event will be high quality, too.
This guide is crafted to help event organizers design and print badges that reflect your brand and make networking easier.
If you want the step-by-step workflow for designing badges, setting up onsite printing, and running fast check-in, start here: Event Badge Printing Software
While we’ll use Accelevents event badge management as an example, the information below applies to setting up an effective badge system on any event platform.
How can I create custom badge designs for events?
Custom badge design comes down to two things: a branded layout that looks professional and variable attendee fields that are easy to scan and read onsite. Start by deciding how the badge will be worn (lanyard, clip, holder). Then choose a size and layout where the attendee name is the most readable element. Add your logo and event colors, then place key fields like company, job title, and a QR code for check-in, lead capture, or networking. If you want a fast way to build and test designs, use a badge template or create a badge from scratch, then run a test print before event day.
Choose your approach based on what you need
If you need speed and consistency, use a template so every badge type follows the same layout.
If you need strict brand control, create from scratch so size, spacing, and hierarchy match your brand rules.
If you need scanning workflows, prioritize a QR code so badges support check-in, lead capture, session tracking, or networking.
Quick checklist for a professional custom badge
- Make the attendee name the largest, most readable element.
- Add organization and title to support networking.
- Add event branding (logo, theme colors).
- Include a QR code if scanning is part of your onsite workflow.
- Test print using your real badge stock so spacing and readability are correct.
Common questions
Can I create different badge designs for different attendee types?
Yes. Keep one base layout, then vary elements like labels, colors, or fields for VIPs, speakers, exhibitors, staff, or press.
What should I include on a badge for networking?
Name, company, and title are the essentials. A QR code can help people connect quickly and help exhibitors capture leads.
How do I avoid badges that look good on screen but print poorly?
Always do a test print on the actual badge stock and adjust font size, contrast, spacing, and truncation for long names.

The Four Advantages Of Integrated Badge Management Systems
Opting for a fully integrated event platform that combines badge management, registration, and check-in can have significant benefits, which we’ll explore below.
- Efficiency
Integrating registration, check-in, and badge management into a single system simplifies processes and results in faster, more efficient operations.
- Data Integrity
Integrating registration, check-in, and badge printing reduces the likelihood of data errors. Names, titles, company names, and other vital badge information will be accurately displayed, aligned with what attendees entered during registration.
- Cost and Time Savings
Why invest in multiple software solutions and subject your staff to lengthy training programs when you can consolidate all your event processes, including badge management, within a single event platform?
- A Better Event Experience
Attendees love a quick check-in process. With an integrated system that prints badges efficiently, they can start their event experience promptly and on a positive note.
Once checked in, attendees will find a well-designed event badge incredibly helpful for networking. A well-designed conference badge can be a real conversation starter.
Badge Management 101 with Accelevents
Now that we've discussed the benefits of choosing an integrated badge management system let's dive into the process of designing and printing professional badges using our event management software. For a full walkthrough of Accelevents badge templates, custom layouts, and onsite printing setup, see Event Badge Printing Software

Step 1: Design Badges Like a Pro
Information To Include On Your Badge
Designing professional badges is simple with Accelevents. Event planners can pick a customizable badge template or create a badge from scratch using our Badge Designer.
Here is some basic information you’ll want to include on your badges:
- Attendee Name: Make it prominent! Ensure names like "John Doe" are legible and appropriately sized, facilitating easy interactions with fellow attendees.
- Job Title & Organization: Include specific titles such as "Marketing Director at TechCorp" to create effective networking opportunities.
- Event Branding: Add event-specific elements like logos or theme colors to your design. For example, if your summit is titled "Future of Tech," integrate tech-inspired graphics or the summit's official logo to align the badge with the event theme.
- QR Code: Including a QR code is more than just a modern touch; it's a necessity, as we will explore in the next section of this blog.
You may also want to add custom fields such as registration type (VIP, student, press, speaker), access level (for better access control), or social media handle.
The Importance Of A Clean and Professional Design
When designing event badges, start by considering where and how the badge will be affixed to the attendee. A branded lanyard can add an extra touch of professionalism, while a clip-on plastic badge might be suitable for more casual events.
Choosing between a lanyard, a clip-on with a plastic card, or other types of badge holders will greatly impact the overall design of the badge.
Once that is decided, move on to determining the badge size, deciding between double or single-sided options, and choosing between sharp or rounded corners for example.
Next, turn your attention to the aesthetics. Decide whether to go for full-color name tags that stand out or opt for a more subtle, monochromatic design. The design should align seamlessly with your event's branding and theme. This step is about finding the right balance between aesthetics and practicality, ensuring that the badge is on brand while presenting information clearly and professionally.
To help you craft an impactful badge, take a look at our 5 event badge design rules for professional badges!
Luckily, with Accelevents' badge designer, you can design custom event badges in any size and format from scratch or tweak a badge template to get exactly what you need. It’s all about making badges that are as unique as your event!
Why You Should Display A QR Code On Your Badge
Adding a QR code to your badge is a strategic move; here’s why:
- Help Attendees Grow Their Network: By scanning their QR code, attendees can instantly connect with other event participants. There is no need to search through the app – a quick scan locates the desired participant profile. Think of it like sending a friend request that helps attendees expand their network and remember who they've met. Once connected, event contacts stay linked for future events. At the next event, these connections can easily be located under the “People” tab in the app.
- Engage Attendees With Gamification: Another standout advantage of QR code scanning is the integration with gamification tactics. Attendees can earn points when exhibitors scan the QR code on their badge to capture them as leads.
- Accelerate Session Check-in: Tracking session attendance shouldn't be a time-consuming hassle for your staff! Just enable attendees to check into sessions by scanning their badge themselves.
- Facilitate Lead Capture: The QR code on a badge represents a real treasure trove for exhibitors and vendors. Just a quick scan and they get all the important attendee details, streamlining their lead generation efforts.
Step 2: Preparing For The Printing Process
The next step in managing badges is making sure printing goes smoothly. With Accelevents, this part is straightforward.
Essential Equipment For Printing Professional-Grade Badges
Recommended Badge Printers: For the best results, our platform is designed to produce a single badge per page. We recommend the Zebra ZD420, ZD500, or ZD620 thermal printers for their exceptional quality and performance. But we also support a wide variety of other printers, so be sure to explore detailed guide on how to choose the best event badge printer for your next event.
Paper/Card Stock: Choosing the appropriate paper is vital for thermal printers. Thermal paper is tailored for these devices, guaranteeing sharp and enduring prints. Choose durable yet lightweight paper. Think about laminating your badges, too – lamination adds sturdiness and a touch of elegance, which is particularly beneficial for extended events or if the badges are intended as mementos. For more detailed recommendations, check out our guide to event badges - we explain everything you need to know about suitable materials and display options.
How To Prepare Your Designs for Print
Designing an aesthetically pleasing badge is one thing; making sure it prints perfectly is another. Here are some essential tips to ensure your design is print-ready:
Resolution: While a badge may appear crisp on your digital display, it might translate differently in print with the right settings. To guarantee the best print quality, use the darkest print setting and select the highest DPI (dots per inch) your printer allows. This ensures that your badge remains sharp and free from pixelation when printed.
Padding: Consider padding as a buffer zone around your badge's design. Adding an extra space of about 1/8 inch (3mm) ensures that everything you want is included when the badge is printed and cut. This prevents any design elements from accidentally being left off the edge, helping you achieve a cleaner, more professional look.
Fonts and Typography: Prioritize readability when selecting your badge's font. We recommend a classic and easily legible font like Times New Roman. Accelevents offers a curated selection of font styles; it's beneficial to play around with them to determine which best aligns with the mood and theme of your event. This ensures a consistent appearance, optimizing the legibility and aesthetics of your badges when printed.
Proofing: Ensuring the accuracy and quality of your badge design is key. Before diving into the full printing process, we strongly advise a meticulous review of your design. Review the following:
- Typography: Ensure that font sizes are legible and that there are no typographical errors.
- Layout Consistency: Make sure that margins, alignments, and spacings are uniform across all badges, especially if there are variations in attendee titles or names.
- Graphics and Logos: Confirm that graphics or logos are clear, not pixelated, and positioned correctly without overshadowing crucial information.
Once you're satisfied with the digital design, conduct a test print on the material you intend to use for the final badges. This can highlight issues that might not be evident on screen, allowing you to address any potential discrepancies or errors before committing to the complete printing task.
Event Badge Printing: When Is The Right Time to Hit 'Print'?
Choosing when to print your event badges is as important as their design. Here are your options:
Option 1: Pre-Event Printing
Pre-printed badges are great for events with stable registration numbers and few last-minute registrations or changes. This approach guarantees that badges are prepared, arranged, and readied in advance, simplifying the on-site setup and reducing stress on the day of the event.
Pre-printing cannot however accommodate sudden changes or additional registrations. Making post-printing adjustments requires reprints, which wastes material and time.

Option 2: On-Site Badge Printing
On demand printing with an integrated badge management system like Accelevents has many advantages:
- Rapid Printing: The Accelevents badge printing solution allows for badges to be printed in less than 2 seconds, so your attendees never have to wait in a queue to check in.
- Flexibility: Easily edit and reprint badges as needed during the event. This adaptability is perfect for accommodating any last-minute changes or corrections.
- Convenience For Walk-Ins: Instantly print badges for walk-in attendees,ensuring there's a minimal wait time, even for those who haven't pre-registered.
- Offline Protection: Never worry about internet outages. The system offers offline protection, ensuring printing continues smoothly even without an internet connection.
- Sustainability: Reduce paper waste and environmental impact by printing badges on-demand, minimizing the need for excessive pre-printing.
One important caveat: While Accelevents streamlines the badge printing process, it's essential to have dependable printers and an efficient on-site team. Otherwise, attendees may still experience extended wait times at check-in.
Step 3: Printing Badges On Event Day
Accelevents' badge management functionality works seamlessly with our event registration and check-in features, allowing you to check in attendees and print their badges quickly and efficiently.
Here are two ways to check in attendees at your in-person event:
Assisted Check-In: Event staff registers attendees and print their badges at the venue. This ensures that badges have the latest information and reduces unnecessary waste. Even last-minute attendees can be quickly registered and given badges, ensuring they have a seamless experience, just like pre-registered attendees.
Self-Check-In in Kiosk Model: The Accelevents Admin App can be switched to kiosk mode to accommodate self-check-ins. Attendees can either scan their QR code or find their registration on the kiosk, check themselves in, and print their badges all in one go.
Both of these methods reflect Accelevents' commitment to providing flexible, attendee-focused solutions that prioritize efficiency and ensure a smooth check-in experience.

The Crucial Role of Streamlined Badge Systems in Event Operations: Key Takeaways
Streamlined badge systems are essential for smooth operations. Here's what we've covered in this guide:
- Integrate Event Check-In And Badge Management: A seamless check-in process with instant badge printing saves time and enhances the attendee experience.
- Design Professional Badges: Thoughtfully select your design elements to craft a polished and professional badge that reflects your event’s high quality and standards and makes a memorable first impression.
- Make Your Printing Process As Adaptable As Possible: Whether pre-printing or on-demand printing, ensure you can adapt to changes and quickly print badges for attendees, while maintaining a professional and relaxed event atmosphere.
If you're interested in learning more about badge management with Accelevents, feel free to contact us.
Our event management platform supports all types of events, from large conferences and trade shows to intimate seminars and workshops. We’d be happy to learn more about your event planning process to help address your specific needs!
Don’t Want to Buy? Rent Everything You Need With the Accelevents Onsite Kit
If you're not ready to invest in your own badge printers—or just want a plug-and-play solution—we’ve got you covered. The Accelevents Onsite Kit includes everything you need for fast check-in and high-quality badge printing, delivered right to your event.
It’s perfect for events with up to 1,000 attendees and includes:
- Zebra printers (pre-configured)
- iPads with Accelevents software installed
- Direct thermal badge stock
- Cellular router with data
- Lanyards, stands, and more
Choose from Standard or Large kit sizes depending on your crowd. Just doing check-in without badge printing? We also offer a streamlined Kiosk Kit.
Every kit comes with a setup call, plus one hour of remote support to make sure you're ready to roll. Want more help? Add onsite support and we’ll handle setup, troubleshooting, and tear-down for you.
No learning curve. No shipping headaches. Just a better onsite experience—out of the box.
Learn more about the Accelevents Onsite Kit